Friday, October 5, 2012

Wildwood Capelet - New Crochet pattern and tutorial


The new Wildwood Capelet is a shawl-style capelet with a rounded hood in soft and chunky crochet. The hood has a rounded design and utilizes a special technique that is described below.

© 2012 LazyTcrochet

I'm including this video tutorial to demonstrate my version of a flat braid join in crochet. It's a technique that is often used to join granny squares, but I have interpreted it here for the purpose of joining the back of the hood for my Wildwood Capelet pattern. (Not a professional video, but I think it clearly demonstrates how to create the stitch while joining.)
This hood pattern also utilizes the DcCh (Double Crochet Chain) or Foundationless Double Crochet as described in an earlier post http://lazytcrochet.blogspot.com/2013/06/foundationless-double-crochet-tutorial.html


The pattern for the Wildwood Capelet is available on Craftsy and Ravelry. © 2012 LazyTcrochet 


Thursday, September 6, 2012

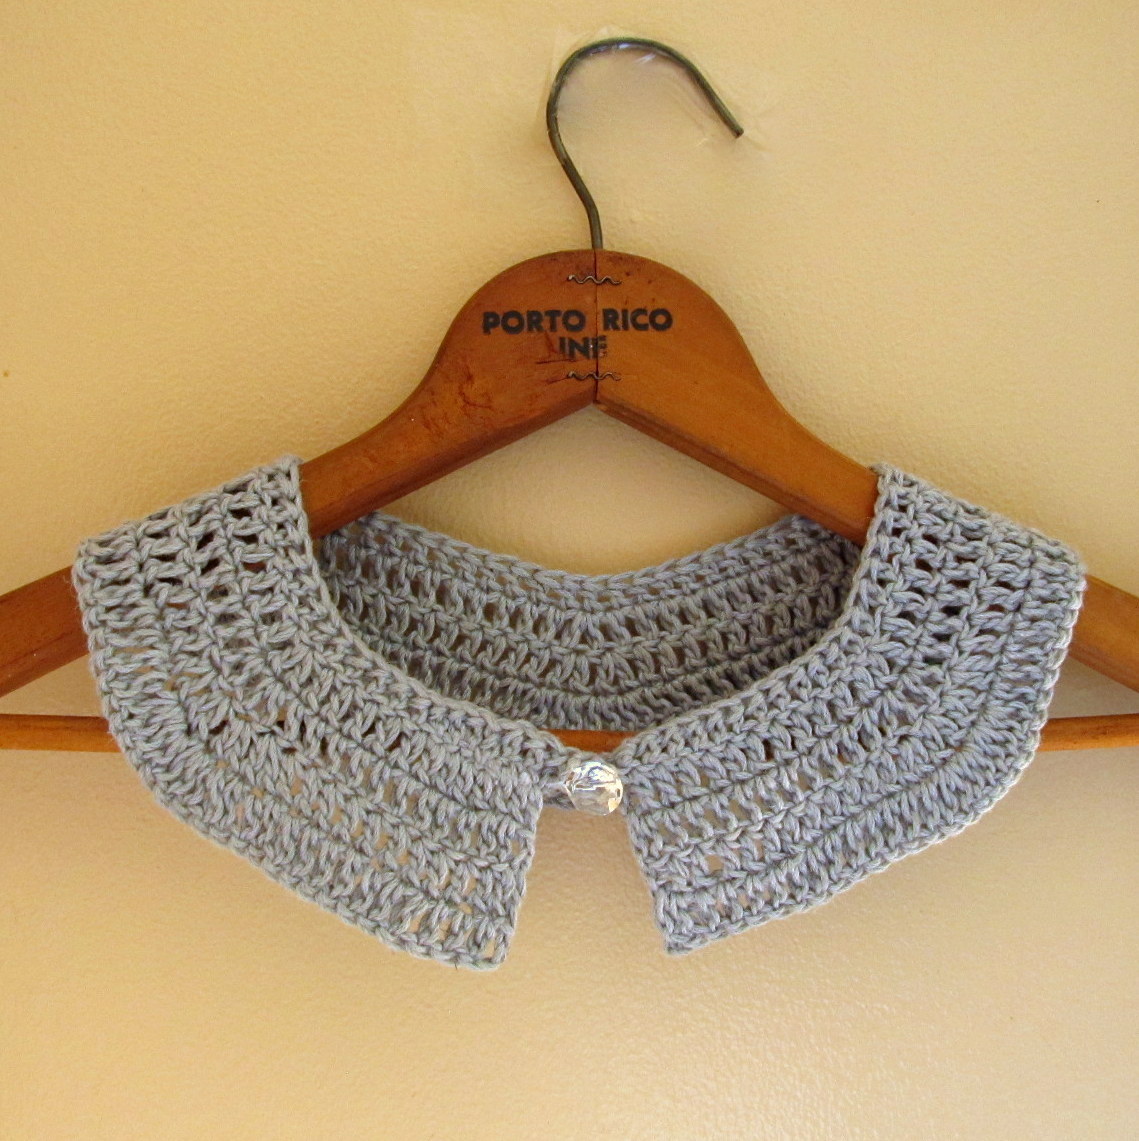
Crochet Collar from LazyTcrochet

Crochet Collar Pattern


© 2012 LazyTcrochet
For personal use only.

Rowan Creative Linen (linen and cotton blend)
1 button (5/8” shown)
E hook (3.50 mm)
Ch 2 counts as first Dc in each row.
Gauge:  Approximately 15 dc and 8 rows = 4”
Collar is approximately 19” X 2 ½”.

Row 1:  Leaving a 10” tail, Dc Ch 69, Ch 2, turn. (Instructions for the Dc Ch, or foundationless crochet are here... http://lazytcrochet.blogspot.com/2013/06/foundationless-double-crochet-tutorial.html)
Row 2:  Dc in next 11, 2 dc in next, *dc in next 10 sts., 2dc in next.* Repeat from * to * 3 more times. Dc in last 12. Ch 2, turn.
Row 3:  Dc in next 11, 2 dc in each of the next 2 sts., *dc in next 10 sts., 2 dc in each of the next 2 sts.*  Repeat from * to * 3 more times. Dc in last 12. Ch 2, turn.
Row 4:  Dc in next 11, 2 dc in each of the next 4 sts., *dc in next 10 sts., 2 dc in each of the next 4 sts.*  Repeat from * to * 3 more times. Dc in last 12. Ch 2, turn.
Row 5:  Dc in next 13, 2 dc in each of the next  4 sts., *dc in next 14 sts., 2 dc in each of the next 4 sts.*  Repeat from * to * 3 more times.  Dc in last 14. Fasten off.
Using the tail of the yarn to crochet a button loop, insert the hook at the side of Row 1 and pull up a loop. Chain 5 (or however many you need to fit the button you want to use), join with slip stitch and fasten off. Work the ends in. Sew a button to the opposite side. Steam block, if desired.
 
For the natural color shown, I used DMC Senso Linen Cotton.
Follow instructions above through Row 4.
For the scalloped edging, Ch 1, skip 2 stitches, work 5 dc in next stitch, (skip 2 stitches, sc in next , skip 2 stitches, 5 dc in next) repeat across, skip 3 stitches at the end and sc in top of turning chain. (17 scallops made.)  Fasten off.
Using the tail of the yarn to crochet a button loop, insert the hook at the side of Row 1 and pull up a loop. Chain 5 (or however many you need to fit the button you want to use), join with slip stitch and fasten off. Work the ends in. Sew a button to the opposite side. Steam block, if desired.


© 2012 LazyTcrochet
For personal use only.


Wednesday, November 30, 2011

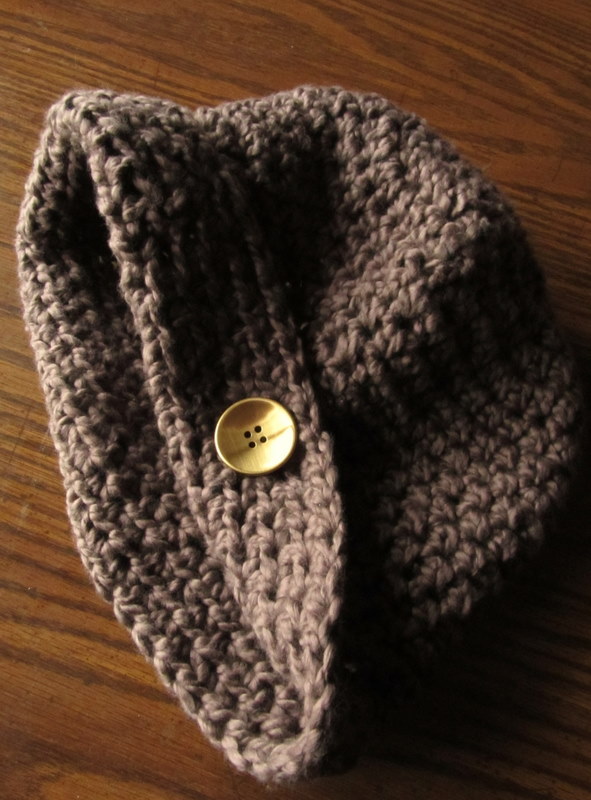
Crochet Hat Pattern - Organic Cotton

Simple Crochet Hat from me, LazyT. Happy Holidays!
1 skein Nature's Choice Organic Cotton from Lion Brand Yarn (walnut color shown)
J (6 mm) hook
Fits adults/teens.

Ch 3, work 7 hdc in first st. Join. (8 hdc)
Ch 2, hdc in same. 2 hdc in each. Join. (16 hdc)
Ch 2, hdc in same, hdc in next. *2 hdc in next, 1 hdc in next* Repeat from * to * around. Join. (24 hdc)
Ch 2, hdc in same, hdc in next 2 sts. *2 hdc in next, hdc in next 2 sts.* Repeat from * to * around. Join. (32 hdc)
Ch 2, hdc in same, hdc in next 3 sts. *2 hdc in next, hdc in next 3 sts.* Repeat from * to * around.
Join. (40 hdc)
Ch 2, hdc in same, hdc in next 4 sts. *2 hdc in next, hdc in next 4 sts.* Repeat from * to * around. Join. (48 hdc)
Ch 2, hdc in next and each st. around. Join. (48 hdc)
Repeat until out of yarn, or until hat is desired length. Fasten off.

*Optional - Fold up brim and sew on a button.©2011 LazyTcrochet

**My approximate gauge was 10 stitches X 9 rows = 4 inches. I ended up with 16 rounds of hdc, after the increases. When I increased to the 48 stitches, my circle measured approximately 6 1/4" (slightly stretchy). And this hat fits ladies/teens.
If your gauge is tighter, you could either add one more increase row (to 56 sts.) but that might be too loose, or you could try working with a larger hook (K).**

Tuesday, October 18, 2011

Crochet Pattern Granny Square Circle Shrug

The pattern is now available for this shrug. It's crocheted out of Cascade Eco Wool and is a snuggly one-size-fits-all kind of shoulder warmer shrug. Not your typical granny square. Visit the pattern page here...
http://www.etsy.com/listing/84058713/crochet-pattern-granny-square-circle and the finished sweater is available in the same Ecru color as in the photo here... http://www.etsy.com/listing/83310800/ecru-wool-shrug-crochet-circle-sweater


Click HERE for all available patterns.

Thursday, August 25, 2011

Circles

Circles seem to be all the rage. I've come up with a pattern for my circle vest shrug since so many people have asked for it. Some designs start with a circle at the back and continue all the way around the collar. This one has a distinct square back to it, with an added circular collar around. You can add a button or use a shawl pin. I have both the pattern and finished designs available at LazyTcrochet.Etsy.com.
Here's one in Paprika, with a wooden button...

And Black, with a wooden shawl pin...


The pattern is available in my Etsy shop here. See my post on Foundationless Crochet for tips!

Tuesday, July 12, 2011

Felting Time


While Granny Squares are not my favorite thing to crochet, I am excited about felting them into a groovy handbag. It's been a long time since I've felted (or fulled) anything fun. Hats are my favorite thing to felt, but I'll be making mittens, purses, slippers, and more. I think I'll get an electric tea kettle to use down stairs. My water is hot, but it doesn't stay hot enough and I like to add a kettle of hot water to it as it cools down. I was making myself nervous carrying a kettle of boiling water down the stairs.

Crocheting or knitting something and then felting it in hot water is my favorite form of felting.
Wet-felting is fun, but I tend to make a huge mess! Needlefelting is something I'd like to do more of. I've never been "artistic" in the drawing or painting sense, but needle felting seemed to coax the creativity right out of me. It flowed so easily as I painted with the wool. So, I'll be working with some raw and colorful fibers very soon!

Wednesday, June 22, 2011

It's Strawberry Time


****This is a repost of a 2008 blog.****
I thought I'd share a recipe that's been used in my family for as long as I can remember. Every year when the local strawberries are ripe, I buy a flat and freeze some. Sometimes I make strawberry jam, but I definitely have to make a batch of shortcake since the berries are so sweet.

Strawberry Shortcake
Mix together with a wooden spoon 1/4 cup, plus 2 Tablespoons shortening and 1/3 cup sugar. Add 1 egg and mix well. Add 1/2 teaspoon vanilla.
Mix together the dry ingredients - 1 1/2 cups flour, 2 1/2 teaspoons baking powder, and a dash of salt.
Add the dry ingredients to the egg mixture, alternating with 1/3 cup of milk. Mix until combined. If it's too stiff, add more milk (I almost always do, but no one ever changed the recipe).
Bake in a greased round or square 8 or 9" cake pan, sprinkling the top with sugar, if desired...or in muffin cups (approximately 8 muffins). I made a double batch to take to a party last weekend. I love mine served with sliced, sugared berries and milk. Serve with whipped cream or ice cream if desired.
Eat it fresh, or the next day. If you cover them with a towel, the sugar tops will stay crisp for awhile. If you store it tightly in a plastic bag, they'll still be delicious, but will get softer.
This is really good with peaches and other fresh berries also!
Enjoy!

AddThis